
Welcome to our tutorial. Let’s learn how to draw fruits. Below is an easy-peasy step-by-step guide to drawing and painting fruits for kids.
To make it easier, you can print our guide for use during the drawing process.

Video Tutorial: How To Draw A Fruit for Kids
Essentials:
1. Pencil or black marker
2. Paper or drawing pad
3. Colouring supplies
Now let’s draw some juicy fruits!
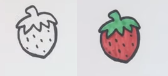
Let’s draw a strawberry.
Step 1: First draw the pedicel and the sepal.
Step 2: Then draw the cone-shaped strawberry fruit.
Step 3: Draw tiny dots on the strawberry fruit.
Step 4: Paint the pedicel and the sepal with green color and the fruit with red color.

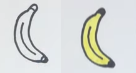
Let’s draw a banana.
Step 1: Draw a curve that’s going upward.
Step 2: Draw a small circle at the bottom of the curve.
Step 3: Make a second curve below the first one.
Step 4: Make the stem.
Step 5: Draw a small curve in between the two curves.
Step 6: Paint the banana using yellow color and the tip and stem with brown color.
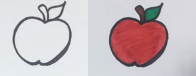
Let’s draw an apple.
Step 1: Draw a circle with a wave at the top half part and another wave at the bottom of the circle.
Step 2: Draw a small curve under the top wave-like pattern.
Step 3: Draw a stalk and a leaf
Step 4: Paint the apple fruit with red color, the stalk with brown color, and the leaf with green color.
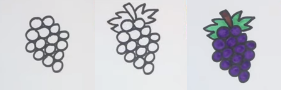
Let’s draw grapes.
Step 1: Draw the first grape – a circle in the center.
Step 2: Add more grapes. On both sides of the first grape, draw several grapes that cover each other and continue until you make a bunch.
Step 3: Draw the leaves and a twig.
Step 4: Paint the grapefruits with purple color, the twig with brown color, and the leaves with green color.
Let’s draw a slice of watermelon.
Step 1: Draw the cone-shaped outline of the slice.
Step 2: Draw the rind by adding two more curves at the bottom part. Thicken the line of the top-most curve.
Step 3: Draw the seeds.
Step 4: To paint the watermelon, color the inner part red, the outer part green, and the part in-between yellow.

Let’s draw cherries.
Step 1: Draw a cherry on the right side – a circle.
Step 2: Draw another cherry on the left.
Step 3: Add a stem to each cherry and join the stems at the top.
Step 4: Attach a leaf to the top where the stems join.
Step 5: Paint the cherry fruits red, the stems and the leaf green, and the point where the stems meet brown.

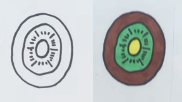
Let’s draw a kiwi.
Step 1: Draw a big outer circle.
Step 2: Draw another inner circle.
Step 3: Draw a small circle at the center as the core.
Step 4: Draw the seeds alternating with spikes between the core circle and the inner circle.
Step 5: Paint the core of the kiwi using yellow color, the outer part using brown color, and the in-between using green color.
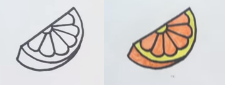
Let’s draw a slice of orange.
Step 1: Draw a semi-circle outline of the slice with another curve joining the semicircle curve halfway and a line joining both ends of the curves on the left side.
Step 2: Draw a scalloped curve inside the semicircle along the outer curve.
Step 3: Draw a small curve at the center.
Step 4: Join lines from the scalloped curve points to the small curve at the center.
Step 5: Paint the orange fruity part and the outer part using orange color and the rest using yellow color
Finally, we have fruit drawings!
Remember practice makes perfect, so keep practicing to perfect your drawings. Also, share your drawings with your family and friends.
Read Also:


